
Car Care Tips
How to clean foggy headlights, so it actually lasts
Foggy, cloudy, hazy or gone properly yellow, it is the same fix and the same mistake everybody makes. Here is the whole method grit by grit, from people who restore four or five sets a week, plus every way it goes wrong and the point where paying somebody is the better deal.
The short version
- Foggy, cloudy and yellowed are all the same thing: an oxidised layer on the OUTSIDE of the lens. You have to physically sand it off. Nothing you spray on will reach it.
- Wet sand from 800 grit, then 1000, 1500, 2000 and 2500 or 3000. Skip a grade and you will not get the previous grade's scratches out.
- Polish it back with a compound, ideally on a drill pad. By hand works and takes a lot longer.
- THE LAST STEP IS THE WHOLE JOB. Finish with a UV coating, not a wax. Without it you are back to yellow inside six months.
- Budget two to three hours for your first set, and about $40 to $70 in materials.
- Stop before you start if the lens is crazed or fogged on the inside. Sanding makes a crazed lens worse, and internal fog is not reachable from outside.
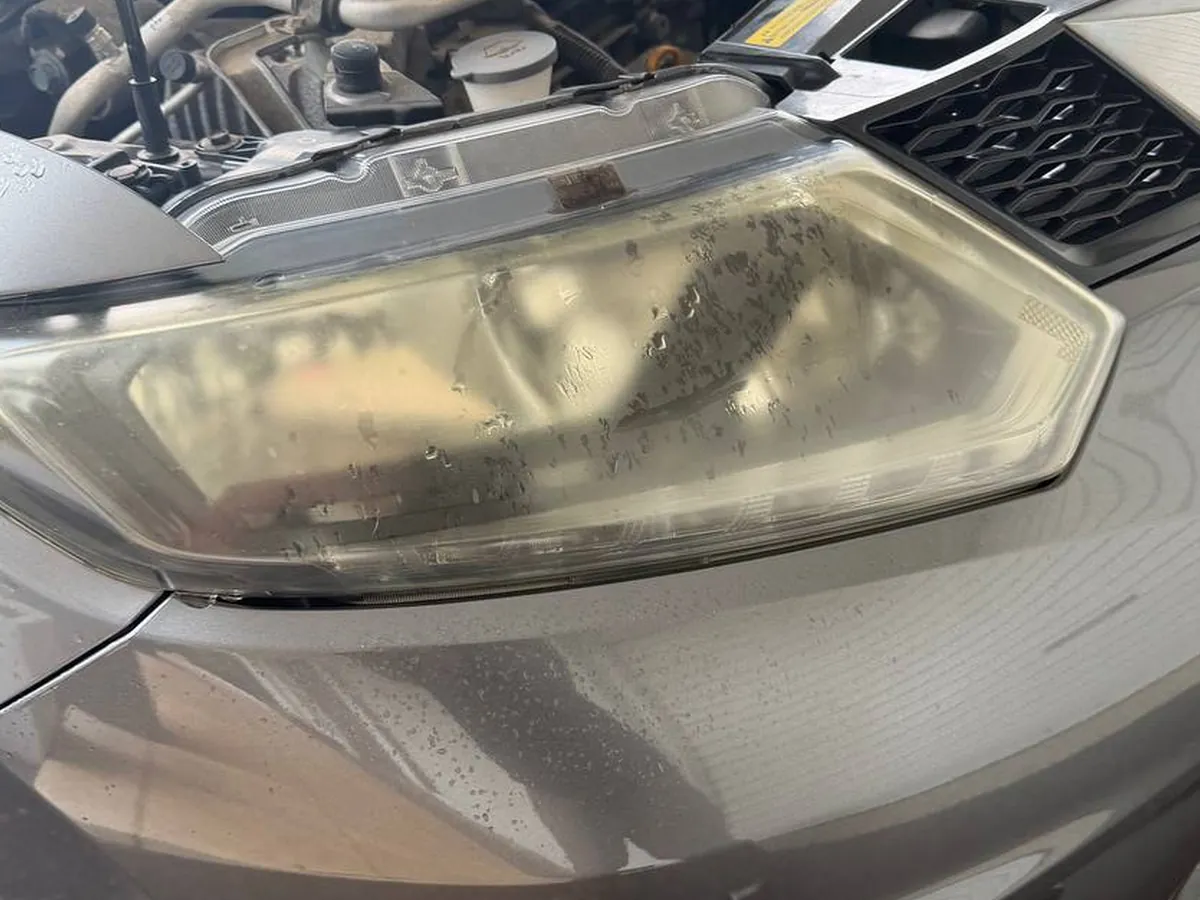
Why headlights go foggy in the first place
Headlights are polycarbonate, not glass. Polycarbonate is tough and it does not shatter, and it has one weakness: ultraviolet light destroys it. So every headlight leaves the factory with a thin UV-resistant coating sprayed on the outside, and that coating is the part doing all the work.
Somewhere between five and ten years in Queensland that coating breaks down. Once it goes, the bare polycarbonate underneath is in the sun unprotected. It oxidises, and oxidised polycarbonate is yellow and cloudy.
So the job is simple to describe and fiddly to do. Sand the dead layer off, polish the sanding marks out, and put a new UV coating on before the sun gets to the fresh plastic. Miss the last part and you are doing this again before winter.
Three checks, and one of them is a hard stop
Two minutes here saves you from making a lens worse than you found it.
Is the haze on the inside?
Run a wet finger over the lens. If the cloudiness disappears while it is wet, it is on the outside and you can fix it. If it looks the same wet, the damage is internal, usually moisture past a failed seal, and nothing you do to the outside will touch it. That is a replacement unit.
Is the lens crazed?
Look closely for a web of fine cracks running INTO the plastic rather than a haze sitting on it. Crazing is the plastic itself failing. Sanding a crazed lens opens the cracks up and makes it visibly worse, and no coating hides it. Stop here.
Is the factory coating still partly there?
Patchy yellowing, clear in places and yellow in others, means the coating is failing unevenly. That is still fixable, but you have to sand the WHOLE lens evenly or you will finish with a patchwork. Do not try to spot-fix it.
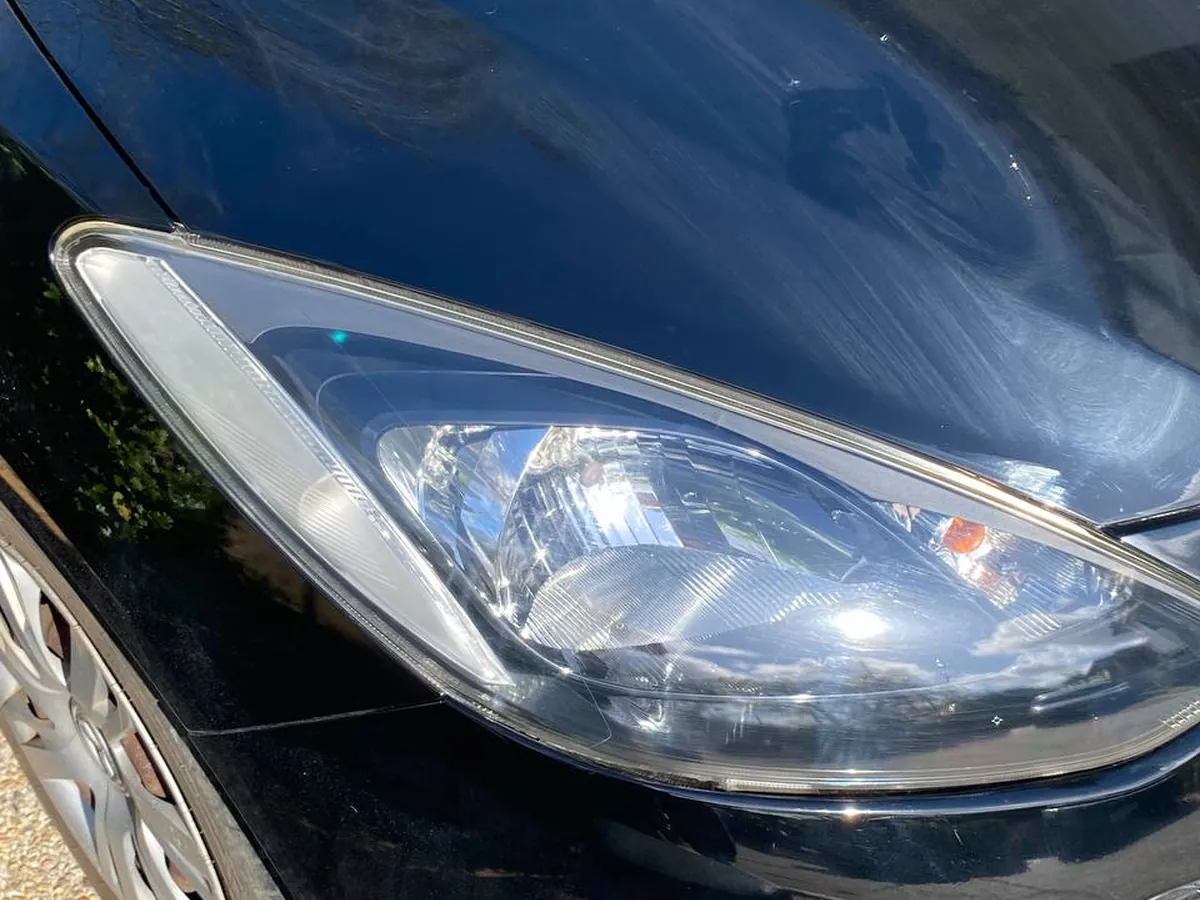
What you need, and what you can skip
Wet and dry sandpaper · 800, 1000, 1500, 2000, 2500 or 3000 · about $2 a sheet
Wet and dry paper in five grades. Any auto shop has it. You want 800, 1000, 1500, 2000 and 2500 or 3000. Buy two sheets of each for a pair of lights. This is the cheapest part of the job and the part that does the actual work.
Masking tape · automotive grade · about $8
Proper masking tape. Not the stuff from the kitchen drawer. You are sanding against paint and a slip costs far more to fix than the headlight was worth.
Cutting compound and a drill pad · about $25 to $45
A cutting compound and ideally a foam or wool polishing pad on a drill attachment. The drill is not essential but it is the difference between twenty minutes and an hour and a half, and it gets a noticeably clearer result because it generates the heat that levels the plastic. A cheap corded drill does fine.
UV coating · ceramic headlight kit or wipe-on clear · about $20 to $50
And a UV coating, which is the step everything else depends on. Supercheap and Repco both stock ceramic headlight coatings, which is what we would buy. A wipe-on clear coat works too. What does not work is a wax, a sealant wipe or a tub of polish, which is what most of the cheap all-in-one kits include and the reason those kits have a reputation for lasting a few months.
Plenty of all-in-one kits exist (Turtle Wax, 3M, Meguiar's, Cerakote, and Repco's own) and they bundle the paper and the polish. Check what the final step in the box actually is before you buy. If the last bottle says wax or sealant rather than UV coating or clear coat, buy the coating separately.
How to clean foggy headlights, step by step
Roughly two to three hours for your first pair. Do one light at a time so you always have the other one to compare against.
1. Wash the lens and mask around it
Clean the light and dry it. Then tape the paint around the whole lens, two layers deep, overlapping onto the guard, the bumper and the bonnet edge. Take your time here. This is the step people rush and it is the step that costs money when it goes wrong.
2. Start at 800 grit, wet
Soak the paper, keep a spray bottle going and keep everything wet the whole time. Sand in one direction only, side to side across the lens, with light even pressure. Keep going until the ENTIRE lens is a uniform dull haze with no glossy patches left. Glossy patches are oxidised coating you have not removed yet, and anything you leave now shows through at the end.
3. Step up to 1000, then 1500
Change direction ninety degrees with each new grade, so now you go up and down. That is how you can see when the previous grade's scratches are gone, because the old ones run the other way. Do not move up until they have all gone. Skipping a grade is the single most common mistake and it leaves marks nothing later will remove.
4. Then 2000, then 2500 or 3000
Direction change again each time. By 3000 the lens should look evenly frosted and feel glassy smooth, and the water should sheet off it rather than catching. It will look terrible. That is correct and it is the point everyone panics.
5. Polish it back
Dry it completely. Compound onto the pad, run the drill at a moderate speed, keep it moving and keep it flat. Work in sections and check your progress often. The lens comes back to clear in front of you, which is the satisfying bit. By hand, use a microfibre and a lot more patience, and expect a slightly softer result.
6. Strip the surface
Wipe the lens down with isopropyl alcohol or a panel prep. There is polish oil on there and it is hiding how good or bad your result actually is. This also gives the coating something to bond to. Look at the lens now, in daylight, before you go any further.
7. Coat it, and do not touch it
Apply the UV coating in thin even passes exactly as the bottle says, usually one or two coats a few minutes apart. Then leave it alone. Most want a few hours before they get wet and a full day to harden. Do this in the shade, not in direct sun, and not when rain is coming.
What the finish should look like
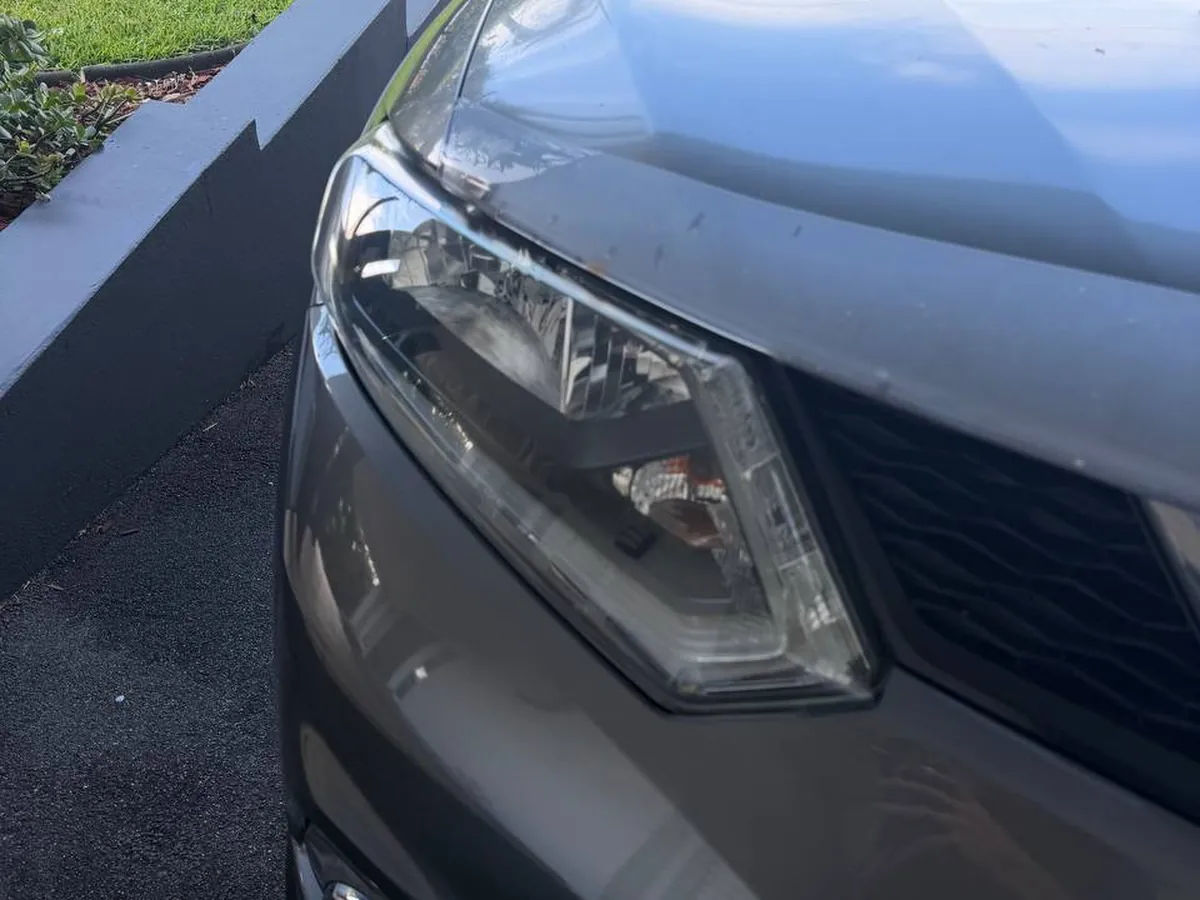
Two of ours, both done with this method. The X-Trail went from this to this in one morning. Drag the slider.
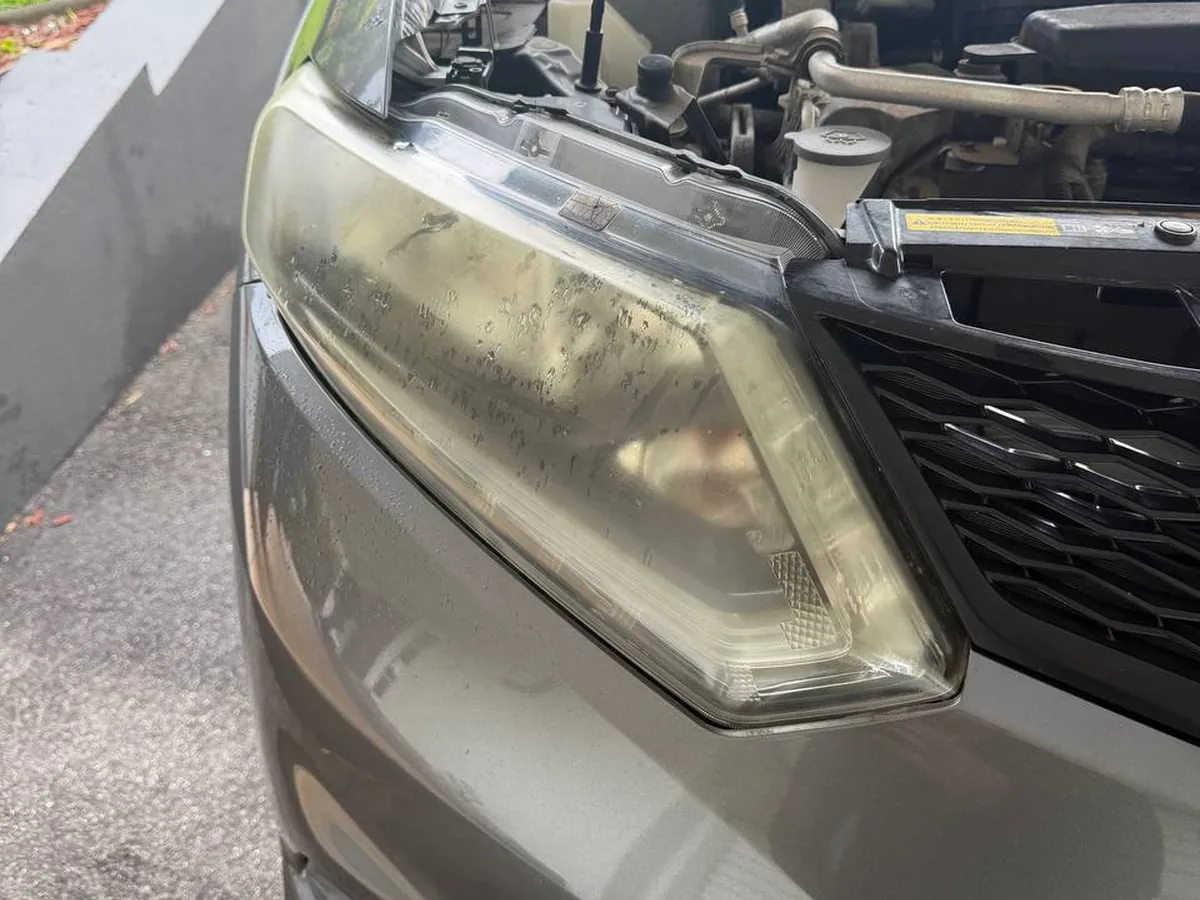
 Before
After
 Before
After
Every way cleaning your headlights goes wrong
We get called out to fix most of these. None of them are hard to avoid once somebody tells you about them, and nobody tells you about them.
Skipping a grit
Going 800 straight to 2000 feels like a shortcut and it is the most common failure by a mile. The 800 scratches are still there, you just cannot see them until the polish goes on and the light catches them. Then the lens looks hazy in a different way and the only fix is to start again at 800.
Finishing with wax instead of UV coating
Second most common, and the reason DIY headlights have a reputation for lasting three months. You have just removed the only UV protection the lens had and exposed fresh plastic. A wax is not a substitute. It washes off and then the sun has direct access to bare polycarbonate.
Sanding dry
Dry sanding loads the paper with melted plastic, which then drags and puts deep gouges in the lens. It also heats the polycarbonate enough to distort it. Keep a spray bottle in your other hand the whole time.
Hitting the paint
The edges are where it happens, and it is instant. Sandpaper takes clear coat off a guard in about two seconds. Mask wider than you think you need to, and when you get near an edge, go slower rather than tilting the paper.
Too much drill, in one spot
Hold a spinning pad still on polycarbonate and you will burn it, which looks like a cloudy patch that will not polish out because the plastic underneath has deformed. Keep it moving, keep it flat, moderate speed.
Coating in the sun or before rain
Heat flashes the coating off before it levels and you get streaks baked in. Rain within the cure window ruins it outright. Shade, no wind if you can manage it, and check the forecast before you open the bottle.
Spot-fixing one patch
Sanding only the yellow bit leaves a visible step where the sanded area meets the unsanded one. The whole lens, evenly, every time.
Stopping too early at 800
If any part of the lens still has a glossy sheen when you finish with 800, there is oxidised coating left there. It will show through the finished job as a cloudy patch and you will not understand why. Uniform dull haze, all over, before you move up.
What it actually costs you to do it yourself
Call it $40 to $70 in materials for a pair if you buy the paper, a compound and a proper coating separately, or $30 to $60 for an all-in-one kit plus a coating because the kit's final step usually will not cut it. Add a drill and a pad if you do not own one.
And two to three hours, realistically, the first time. Maybe ninety minutes once you have done a set before. Most of that is the sanding, which is the part that cannot be rushed, and most of the rest is masking, which is the part that should not be.
That is genuinely good value, and if you enjoy this sort of thing it is a decent Saturday morning. We are not going to pretend otherwise. Plenty of people do this once, get a result they are happy with, and never think about it again.
What stops most people is not the money. It is getting the kit, finding the time, getting halfway through, realising the lens looks worse than when they started, and having nobody to tell them that is supposed to happen at that stage.
Doing it yourself, against having it done
We do these for a living so we are hardly neutral. Here is the comparison anyway, with the bits that actually matter rather than the bits that sound good.
Doing it yourself
- $40 to $70 in materials, plus a drill if you do not have one
- Two to three hours of your weekend, first time
- Result depends entirely on how patient you were at 800 grit
- No comeback if it goes wrong, and sanding through is permanent
- The coating you buy off a shelf is not what the trade uses
- If it hazes in six months, you do the whole thing again
Having it done
- About ninety minutes, and none of it yours
- We come to you, so nothing gets dropped off or collected
- Trade UV ceramic coating, rated in years rather than months
- Guaranteed. If it is not right, we come back and fix it
- We tell you BEFORE we start if the lens is not worth saving
- Cheapest if you add it to a detail you were booking anyway
Both of these are far cheaper than the actual alternative
The thing people compare restoration against is doing nothing. The real comparison is a new headlight unit, because that is where a neglected lens ends up.
A replacement headlight on a common car runs into the hundreds, and on anything with projectors, LEDs or adaptive lighting it runs into four figures for the part alone. Then you are paying somebody to fit it and, on a lot of modern cars, to code it in. Restoration is a fraction of that on either path, yours or ours.
And the window closes. A lens you restore this year is a lens you can restore again in three years. A lens left until it is crazed right through cannot be restored by anybody, at any price, and the only option left is the expensive one.
So the question is not really whether restoration is worth it. It is whether your Saturday is worth more or less than the gap between doing it yourself and having it done, and whether you would rather have a guarantee behind it. That is a genuinely personal call and we are fine either way. If you do it yourself, use the method above and do not skip the coating.
Headlight restoration questions
What grit should I start with on headlights?
800 for a normally yellowed lens, and work up through 1000, 1500, 2000 and 2500 or 3000. Start coarser than 800 only if the lens is badly pitted, because anything coarser cuts deep scratches you then have to remove. If the lens is only lightly hazy you can start at 1000, but when in doubt start at 800. It is far quicker to do one extra grade than to go back because the deep marks never came out.
Can I do it without a drill?
Yes. The sanding is the same either way and that is most of the work. Polishing by hand with a compound and a microfibre works, it just takes considerably longer and the finish usually comes up slightly softer, because a machine generates heat that levels the plastic in a way hand pressure does not. If you are doing this once, by hand is fine.
Does cleaning headlights with toothpaste work?
Briefly, and only on very light hazing. Toothpaste is a mild abrasive, so it takes the very top off and the lens looks better for a few weeks. It does not remove a real oxidised layer, it will not touch a properly foggy lens, and it leaves nothing behind to stop the sun doing it again. Useful before a photo, not a repair.
Does WD40 clean headlights?
It makes them look clear for about a day, and that is worth understanding rather than just dismissing. WD40 is an oil. It fills the microscopic pits in an oxidised lens so light passes through instead of scattering, which is genuinely why the lens looks better the moment you wipe it on. Then it evaporates, the pits come back, and now there is an oily film on your lens attracting dust. It also softens some plastics and will mark your paint if it runs. It is a trick, not a fix, and the oxidised layer is still there underneath.
How do you polish or buff headlights?
After sanding, not instead of it. Cutting compound on a foam or wool pad, on a drill at moderate speed, kept moving and kept flat. Polishing an oxidised lens that has not been sanded just shines up the dead layer, which is why so many headlights look good for a fortnight and then go back to how they were.
How long does DIY headlight restoration last?
Three to six months if you finish with a wax or the sealant wipe that comes in most kits, because you have removed the lens's UV protection and not replaced it. Two years or more if you finish with a proper ceramic or UV clear coat. The sanding is not what decides the lifespan. The last step is.
What is the best coating to use at the end?
A ceramic headlight coating or a UV-resistant clear coat. Supercheap and Repco both stock ceramic headlight kits and either is a big step up from what comes bundled in a cheap all-in-one. What you want to avoid is anything described as a wax, a polish or a protectant wipe as the final step.
Can you restore headlights that are cloudy on the inside?
No, and neither can anyone else without opening the housing. Internal clouding means moisture has got past a failed seal, and the damage is on a surface you cannot reach from outside. Wet a finger and run it over the lens: if the haze vanishes while it is wet, it is external and fixable. If it looks the same, it is internal.
How long does it take?
Two to three hours for your first pair doing it yourself, most of it sanding. We do a pair in about ninety minutes, at your place, because we have done a few thousand of them and the setup is already in the van.
Will restored headlights pass a roadworthy?
A properly restored lens that throws a clean beam is not a defect. Only a licensed inspector can certify your car, but cloudy headlights failing a safety certificate is one of the most common reasons people call us before selling.
Is it worth doing before I sell the car?
It is one of the highest-impact things you can do, because the front of the car is what a buyer sees first and yellow lenses read as neglect across the whole car. It routinely changes what people offer by more than the job costs.
Do you service all Brisbane suburbs?
Yes. We cover all Brisbane suburbs, north side, south side, east, west and surrounds. Travel is built into your quote. We come to you wherever the car is parked.
Want it done, guaranteed, in ninety minutes?
Multi-stage wet sand, machine polish, then a three year ceramic coating over the top. At your place anywhere in Brisbane, and cheapest added to a detail you were booking anyway.